Tuesday 27 December 2011

Painting

I have never enjoyed painting, in fact I will do just about anything to avoid it. Luckily Ngai likes painting.

The cobweb is not meant to be symbolic of the speed of painting.

Monday 26 December 2011

Rear Door/Canopy

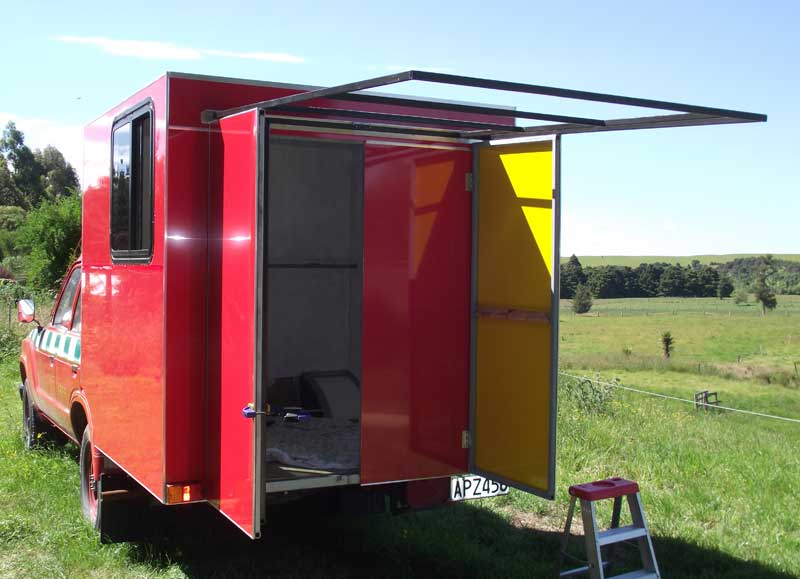
Although it was Christmas, it was also one of the longest days of the year (at least in the southern hemisphere) so a chance to get lots done besides eating, drinking and socialising. Today's task was to 'dry' fit the rear door that is also the support for the rear canopy. It was 'all hands on deck' to get it into place and mark drill holes for the hinges. Although it is summer here it was a chilly afternoon so the workers were keen to finish and get inside.
My HighTech lifting device worked a treat.


The test fit highlighted a little problem in that the door was about 20mm too long. This meant cutting and re-welding the steel. Not a great problem as I have come to enjoy welding.

I had originally fabricated the door in 25mm square 3.2mm hollow steel but felt it was too heavy and went with the suggestion of the engineering supply company of  12mm x 25mm x 1.5mm hollow steel. My first thought was that it felt too light to hold up the awning that I plan to attach to it but with the aluminium sheet attached it may be better. We shall see.

Thursday 22 December 2011

Sometimes it's the little things...

I bought a new tape measure and wanted one with a magnetic end as I had seen someone else use one and thought it would be good. I am using quite a bit of steel so... extra useful there.


 The first model we found was around $40, a little more than I wanted to spend. After an extensive search of the tape measure display we found this one at just $8


The little magnet work well, and since I am now without Dad's extra pair of hands, it makes the job so much easier. It is a Stanley LeverLock and has a self-locking feature that is proving useful and easy to get used to.
Great little device.

Interior lining

Before the beds can be installed I need to line the walls. A helpful retailer suggested 3mm MDF board. It is light, easy to work with and not expensive especially compared to other options. Cutting the holes for the windows was a bit of a pain, the old adage 'measure twice and cut once' should have been more strictly adhered too, it would have saved quite a bit of time and materials.

I have bought two sheets of 4.75mm MDF for the ceiling as I feel the 3mm will sag eventually.

Wednesday 21 December 2011

Another door

The next door is ready to go on. The internal door is a bit heavy and I could have used a less heavy steel but at least it's solid. I decided to use clear polycarbonate for the top section to allow more light.


Tuesday 13 December 2011

Doors on

With Dad home in Australia, it fell to Molly to help with putting the doors on. She is now an expert in handling a drill.

On the chassis

The job of lifting the camper back onto the chassis is a little bigger than taking if off because of the added weight.
Thankfully, friends nearby were happy to help.


Ticket booth

With most of the skin on... looks like a ticket booth to me.

The insulation is installed as we go. I have used Goldfoam an extruded polystyrene product rather than plain white expanded polystyrene. Extruded polystyrene is a little more expensive but doesn't absorb moisture (ie condensation from breathing) as expanded does. It is also solid so easier to install.

Friday 9 December 2011

The skin goes on

The big job of skinning the frame has begun. I chose to use an aluminium composite product called Aluwell or Ultrasign board from Ullrich Alumunium in Napier. The staff at this business have proven to be very helpful and a pleasure to deal with. They have dealt with my 'newbie' questions with enthusiasm.
The sheets are glued to the frame with a polyurethane based product with the occasional screw or rivet where needed. The sheets have a core of polyurethane covered with thin aluminium each side. Luckily one colour available is very close to fire engine red which means no painting is required.
My Dad agreed to come over from Australia to lead a hand and expertise. The task was proving to be a bit bigger than I first thought and his help is appreciated.

Doors

The frame was removed from the body and made its way into the shed so that the work on the rear doors could begin.

Thursday 1 December 2011

So Far...

Progress so far...

The chassis was changed and frame built by Onga Onga Motors.
The petrol tank was originally mounted high above the pump. A fair amount of engineering was required to move the tank.